
How to Colour Comics in Photoshop
Digital ArtHow ToPhoto and ImagePhoto and Image Editing September 22, 2014 Scott Lee
Since the world of printing went digital, line art colouring is now nearly always done digitally. Continuing in our Photoshop how to series, here are a few simple Photoshop tips to make the most out of your comic colouring.
Layers, you need to use multiple layers. This may seem obvious, but taking advantage of the ease with which Photoshop manipulates layers will save you much time. Traditional colourists may be tempted to use Photoshop as a virtual acetate, having the black and white art on one layer, and all the colouring on another, why limit yourself when you can have 100 different acetate layers just as easily? Youíll thank me when you realise you need to correct just one element and donít have to separate it.
Colouring in Photoshop is as much about shapes as it is colours. You can always change hues and tones as you go along, but to do that you need a patch of colour that fits your line art. Don’t be afraid to save time by using the magic wand tool if the line art is defined enough to benefit from it, just make sure murky scans don’t give you uneven edges, adjust the tolerance slider to compensate.

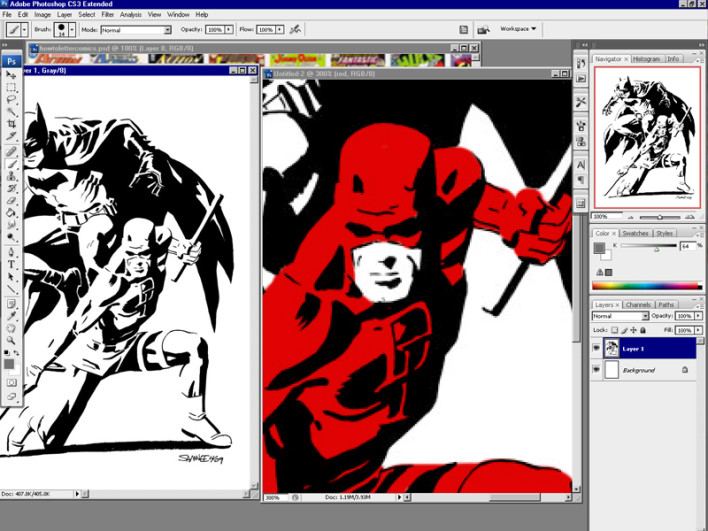
So first open up your black and white art and duplicate the layer so you can make small alterations to it without changing the original. Sometimes you wonít need this and will leave the lines alone, but for lighting and some costumes, those black lines will need to be changed too, this will make it simpler.
For this method we are going to have a new layer for each colour, you can always merge them later, but this way you can play around with the subtle tones later with far more ease. Open a new layer, choose a colour you want to start with, let’s say red, so re-name the layer red and in the drop down box at the top of your layer where it says Normal, change this to Multiply. What this will do is add the colour to your background, instead of just overwriting everything with this colour, so if your background is white, it will paint it red, if the background is black it will ignore it, and if itís anything in between, it will merge the two. This means you can paint away without worrying so much about wiping out any lines, it’s not possible with Multiply. Now use the brush tool to fill in the areas you want to, remember this is a flat red layer, for gradients, highlights and lighting add another layer on top.
Some like to zoom in to above actual size for those tight clean lines, others prefer the looser style that doesn’t worry so much about the odd overlapping edge, itís up to you.
Rinse and repeat the above for each colour and watch the image build. You may find it quicker to do all the flat colours, then duplicate those layers and merge them to add lighting to the overall image, but always retain the original layers so you can go back and change individual elements if you need to.
[Image via Russ Payne]