
How to Use the Gradient Editor in Photoshop
How ToPhoto and ImagePhoto and Image Editing December 1, 2014 Scott Lee
Using gradients of colour in Photoshop often produces very pleasing, professional results, mainly because producing nice smooth transitions between the colours is something a digital platform does very well. The Gradient Fill Tool in Photoshop, located on the left hand sidebar, sharing the same button as the Paintbucket Fill Tool, allows you to fill any layer or selection with a gradation of two or more colours and includes several pre-sets such as Copper, Chrome, Spectrum and Rainbow, but did you know you can create your own custom gradients using the Gradient Editor?
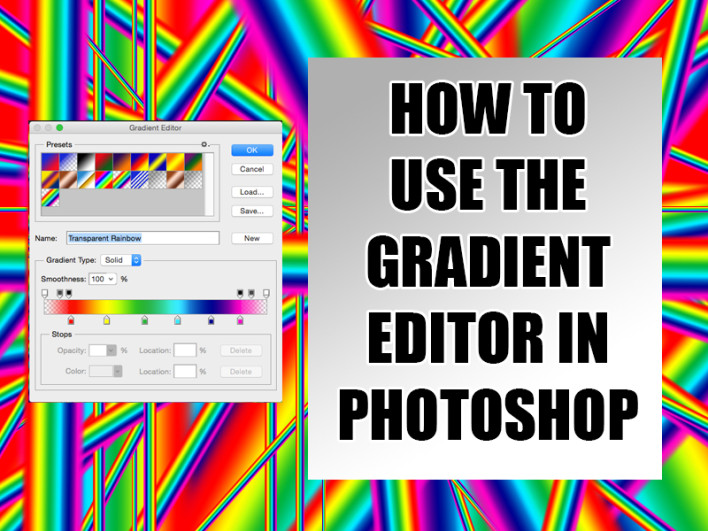
To access the Gradient Editor, first choose the Gradient Fill Tool. In the top menu where it shows a small rectangular preview of your selected gradient, click on this preview box and it will bring up the Gradient Editor window.

The sixteen default Gradient pre-sets will be displayed at the top, you can manage these from here, adding, deleting or duplicating them. Right click on any pre-set to delete, rename or create a new one.
In the middle, you will see a colour bar representing the setting for each gradient, try clicking on each pre-set one by one and notice how this bar changes. Any point where a new colour is set is called a “stop” and these are represented by markers on the colour bar. A gradient can have just two colours, simply changing uniformly from one to another, or have multiple colours and change at differing rates through out. Click on the Spectrum preset and see how this is set up for a multi-coloured gradient. As well as colour values you can also set a stop as transparent, click on the Transparent Rainbow preset to see how this is achieved. Now click on one of the stops and you will see two small circles appear either side of it, this is a colour midpoint, by dragging these circles left and right you can alter how much of each colour takes up the space between the stops.
Now try creating your own Gradient, choose the gradient you would like to base your new gradient on and click the New button. You will see a new pre-set appear in the window. Re-name this new gradient. Now choose your new colours and for each change in colour a new “stop” is created simply by clicking on the bar. Try defining how each colour gradation progresses by clicking and dragging within the stops at the midpoints.
Once you are happy with your new gradation, click save and give it a name, by default it will save this new preset in the Gradients folder for use another time. Now open your original image and see what your newly created design looks like in the real world.
[Image via Russ Payne]