
How to use Autopilot to automate customer communications
BusinessCRMDesktopHow ToProductivityProject Management June 14, 2019 Michael Franco

In some ways, the digital landscape in which businesses operate these days has made life simpler. But in many other cases, things have gotten more complicated. Take customer communications for instance. The phone and snail mail used to be about the extent of things when it came to interacting with your customers. Now, customer communications can happen via email, webforms, SMS and social media channels — in addition to direct mail and phone calls.
Because of this increase in communication channels, developing the right flow for interacting with your customers has gotten exponentially harder. Do you want to send them an email when they order something? Give them a pop-up communications box when they complete a form? What if you want to wait a day or two before reaching out to them after they take a specific action?
Autopilot, a cloud-based software solution, lets you handle all of these interactions and more by using a graphical drag-and-drop interface that’s astoundingly simple to use. Here’s how.
Journeys

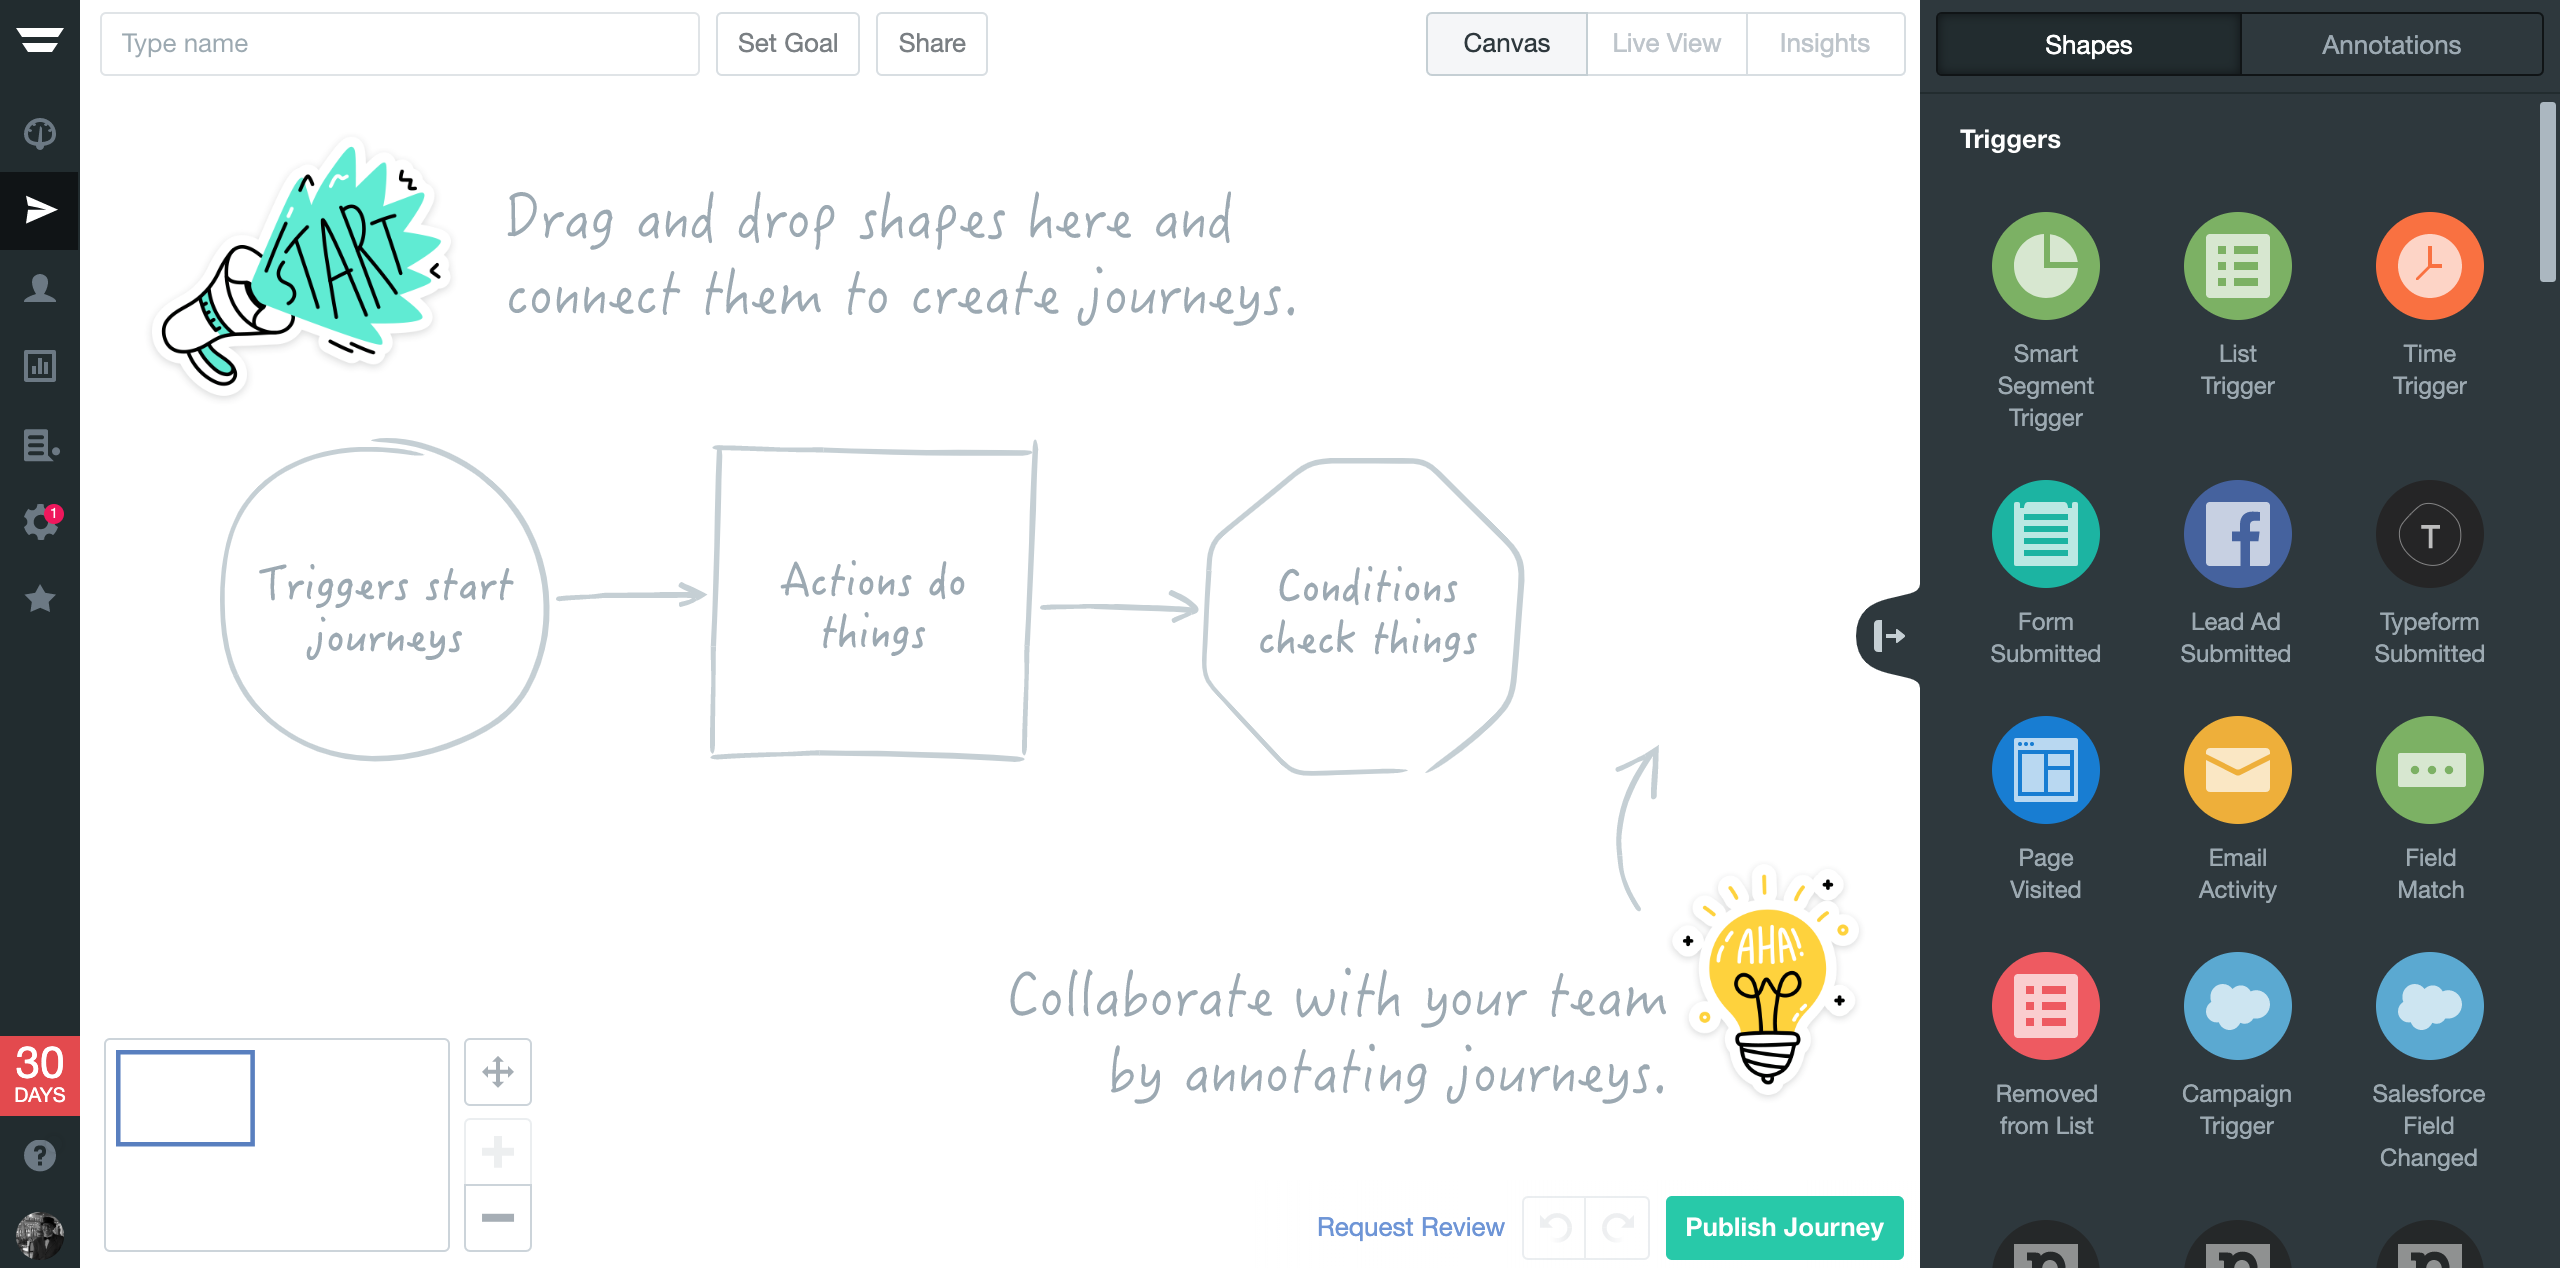
After completing the account set up, you’ll be treated to a sample “Journey” screen that provides an overview of how the software works. It’s an unusual but highly effective at-a-glance way for getting a feel for the program.
Journeys are basically flowcharts that map your customer experience. To navigate around this screen, you drag the blue rectangle in the bottom-left corner of the screen. This allows the canvas on which you plan your journey to be as large as you need it to be, and provides an effective way to quickly get to the spot you need to work on.
Triggers, actions and conditions
Once you’ve created a new Journey by clicking the arrow icon in the left-hand column followed by the plus sign at the bottom right, you can begin to build your customer communications flow simply by dragging items on to the canvas from the right side of the screen.
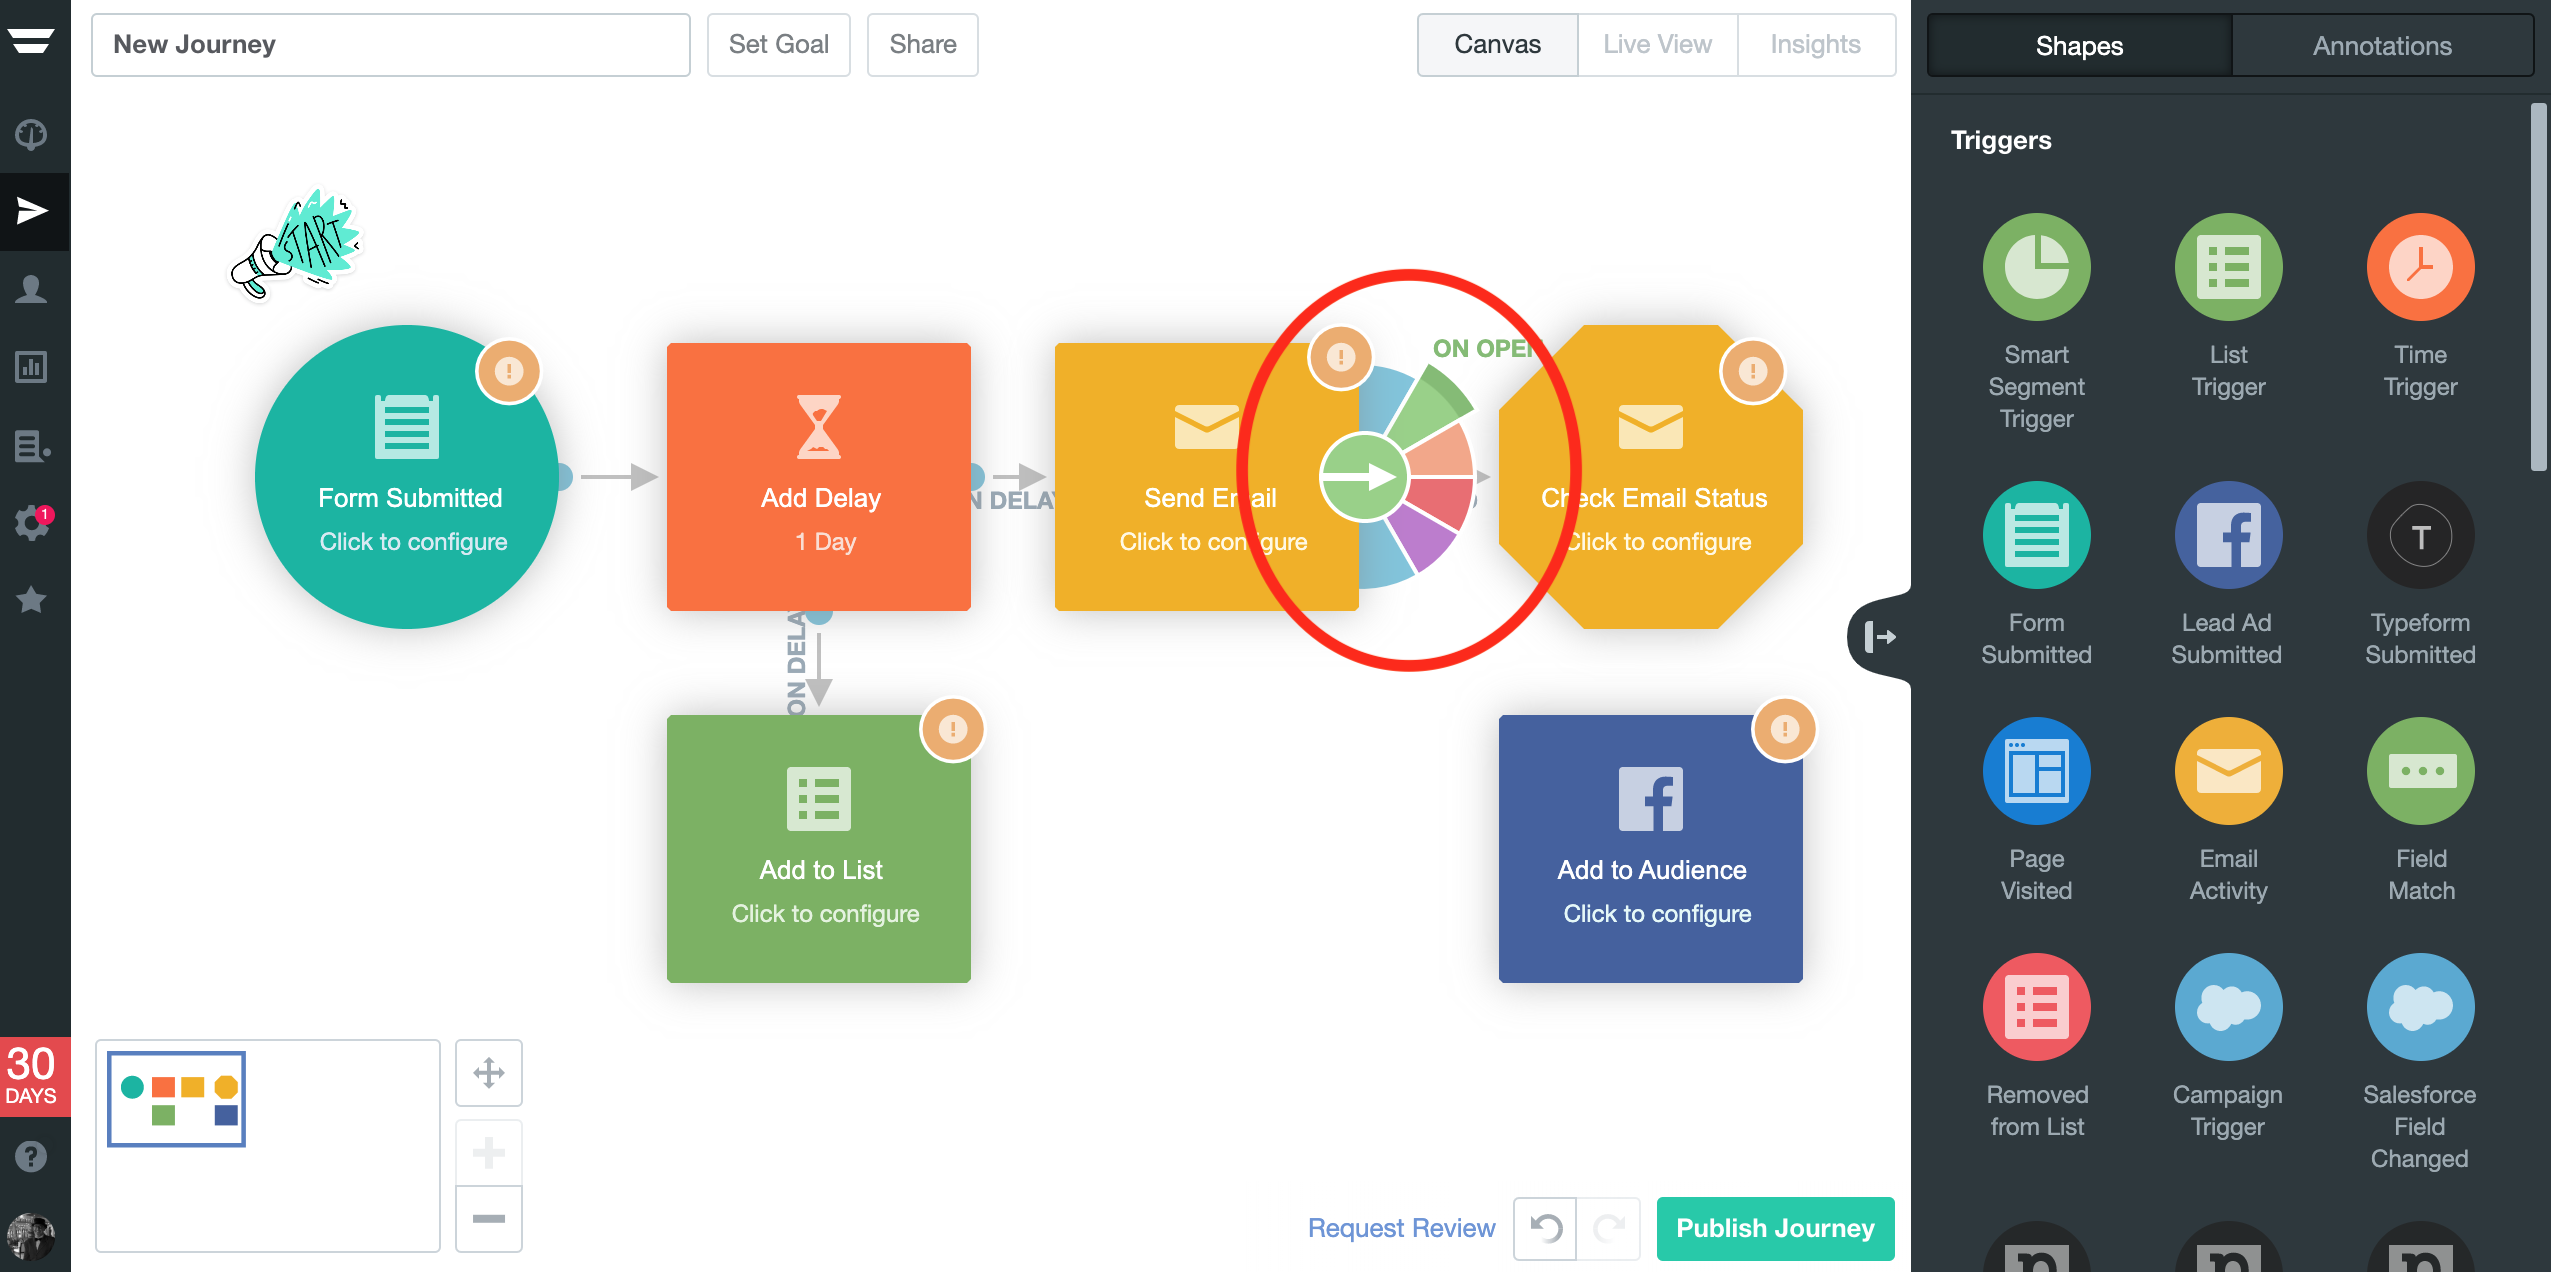
You start with a trigger, an action your customer takes to initiate the flow. For example, if you had a form on your website, you could let the completion of that form be the trigger (after embedding the Autopilot code on the web page holding the form). So you would drag the circle labeled “Form Completed” trigger onto your Journey.
Next, you’d need to add an action you want the software to take once the trigger was activated. That might be sending your customer an email, so you’d drag the “Send Email” square onto your canvas. You can also add conditions into the formula, such as checking to see if a customer is on a certain list, by dragging over one of the hexagonal symbols.
Connecting it all up
Once you have your tiles in place on your canvas, it’s time to link them together. You do this by dragging the arrows that appear when you hover over each tile to another tile. You can even draw arrows between multiple tiles if you want multiple actions to take place once a trigger is activated (add to a database and send an email, for example).
You would also want to take this opportunity to make sure you have the conditions for each tile set. Exclamation points on a tile mean that you haven’t given it all the information it needs to function; for example, you might not have told it where your web form is located.
If you click and hold the arrow on certain tiles, you’ll be able to select certain conditions. For example, click on the arrow on the email tile and you’ll see a rainbow wheel of options you can select from including “on click,” “on reply,” “on open,” and more.
Once all tiles are set up correctly and linked, all you need to do is click the “Publish Journey” button on the bottom right and Autopilot will take over handling your customer communications as you’ve requested.
Templates and other goodies
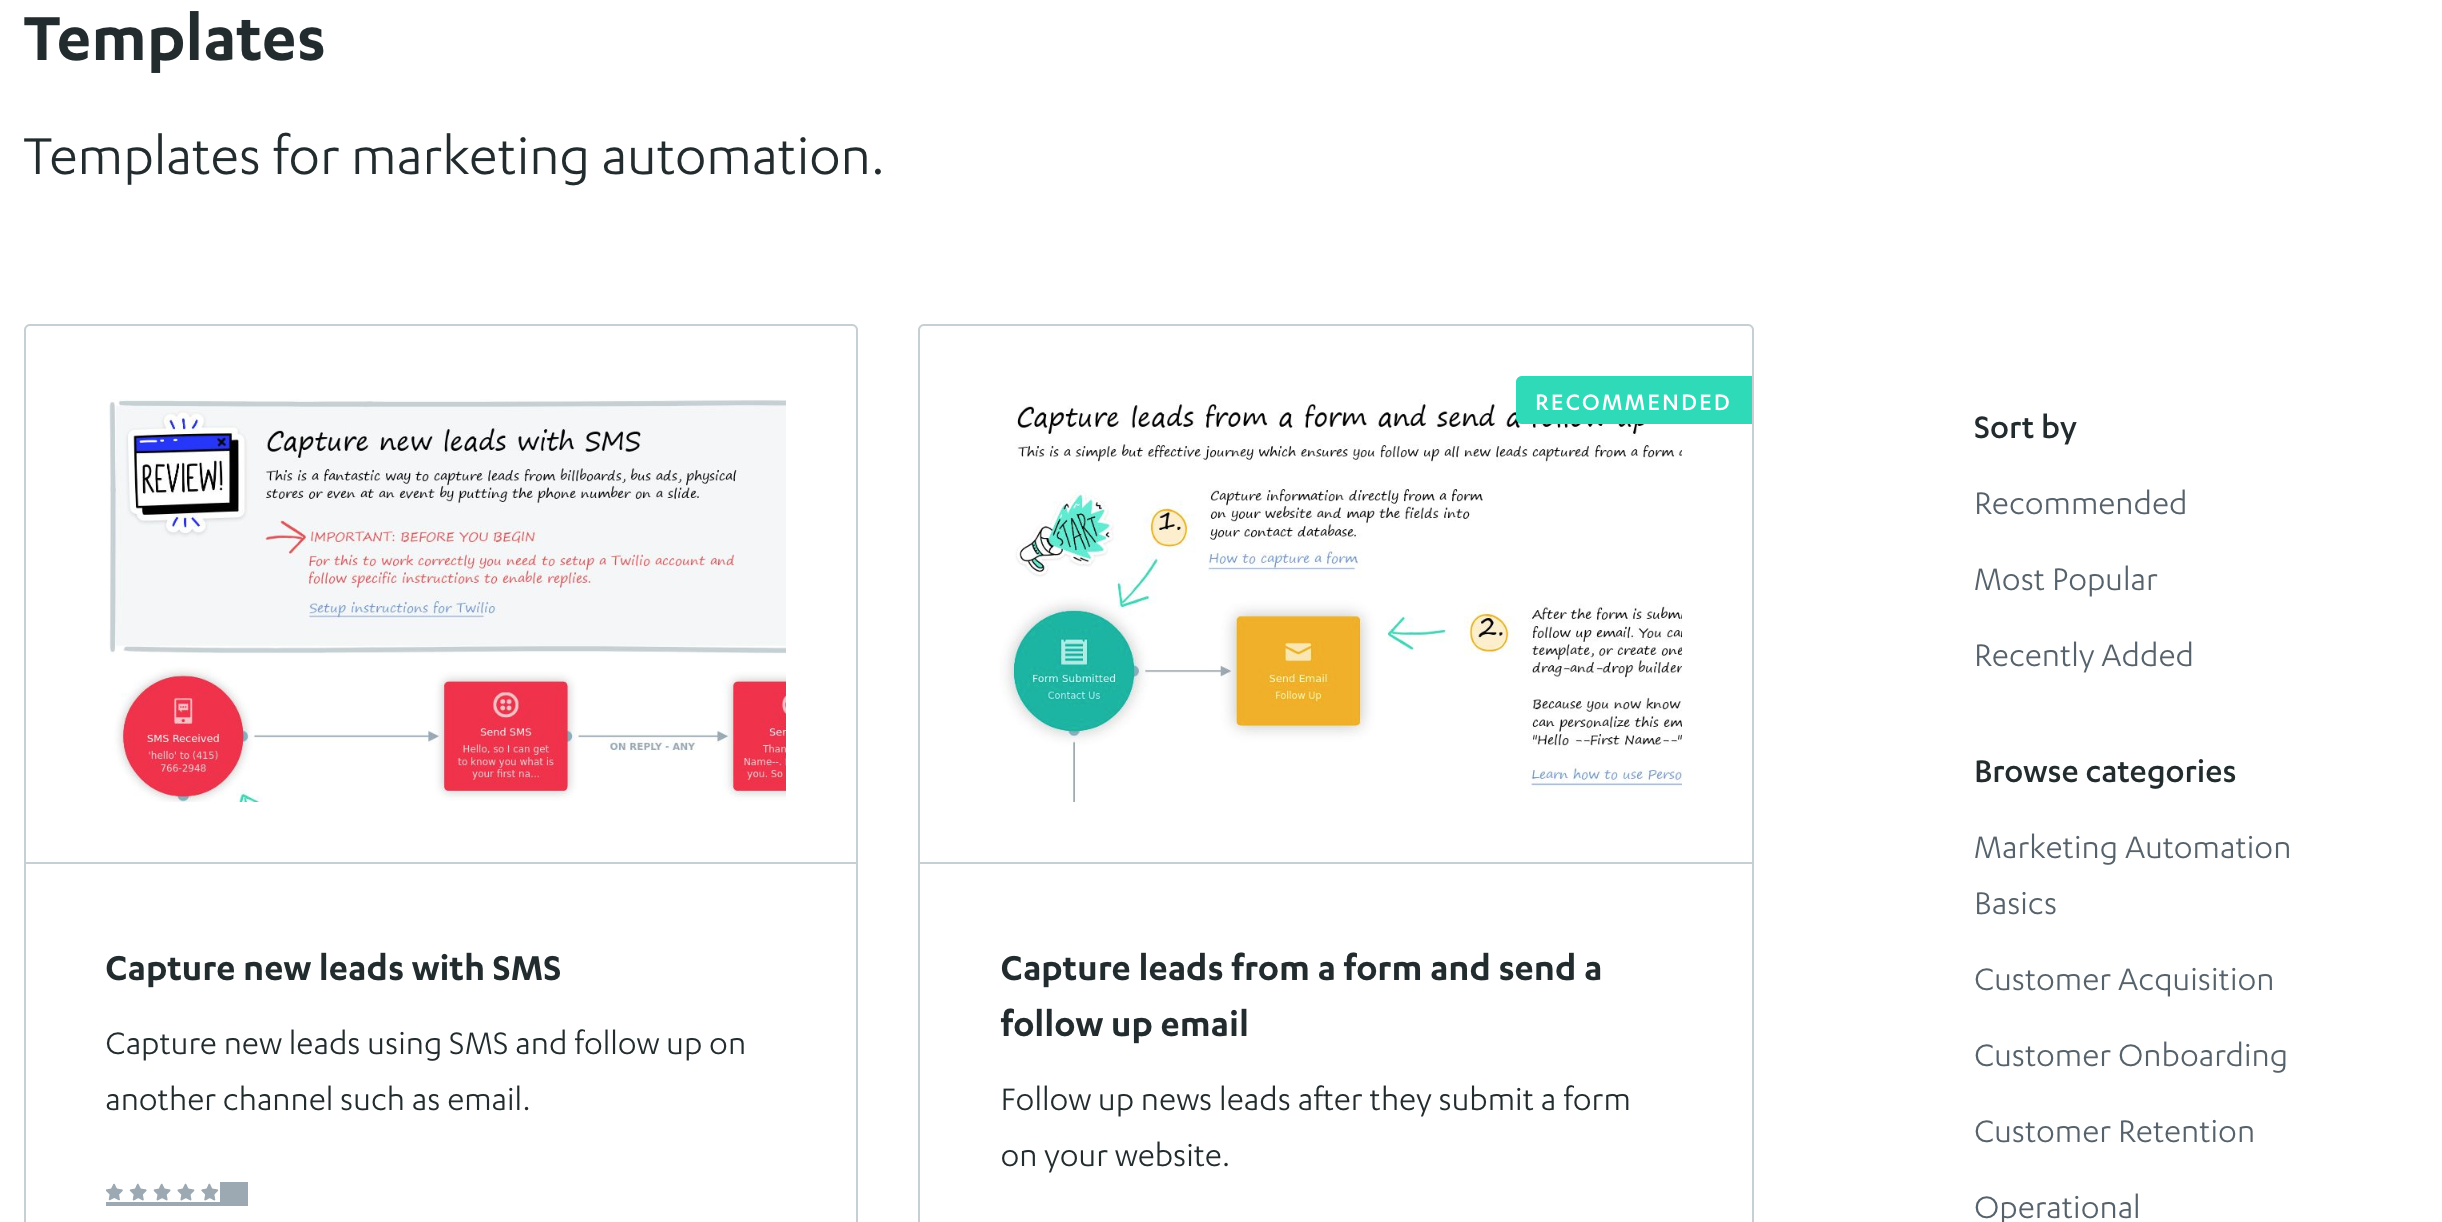
If you’re not quite sure how to set up a Journey, Autopilot also comes with a selection of pre-made templates that let you do everything from capturing leads from SMS to sending a gated piece of content. You can access templates by choosing the Journeys arrow in the left-hand column, hovering over the plus sign at the bottom right, and then clicking the template icon that appears.
One other nice feature of Autopilot is that you can annotate your Journeys with helpful icons, such as those that first appeared on the help Journey. To do so, simply click on the “Annotations” tab in the right column and choose the shapes, stickers, text and other graphics you’d like to add. This feature is especially helpful when working in a team environment.

Pricing
Autopilot pricing works based on the number of contacts in your database, so it’s an extremely cost-effective way for businesses to build customer communications. Up to 500 contacts costs only $1 per month, 1,000 is $25 per month, and 10,000 is $148 per month. All plans come with basic support, which can be upgraded for a fee if desired.
A 30-day free trial version of the software is available here.