

Following the death of Windows XP, millions of people worldwide have been left wondering what to do next. The dilema is whether to upgrade to another version of Windows or perhaps try something completely different, like Linux. If you are leaning more towards the Linux camp but aren’t sure how to go about installing it, don’t worry, we are here to help.
Ubuntu has to be one of the most popular forms of the Linux operating system; it’s free and will run on virtually any computer. The step-by-step guide that follows will take you through the process of installing Ubuntu by booting from a CD. There are other ways but this is the easiest.
1. Download the Ubuntu ISO File
If you go to the Ubuntu website you can download the ISO file, which is basically a CD image file, which needs to be burned to a CD. For the purpose of this article we are looking to install Ubuntu 12.04.04 LTS, which is the current version, giving you continuous hardware support and guaranteed security and support updates until April 2017. (The process will remain the same for future versions too.)
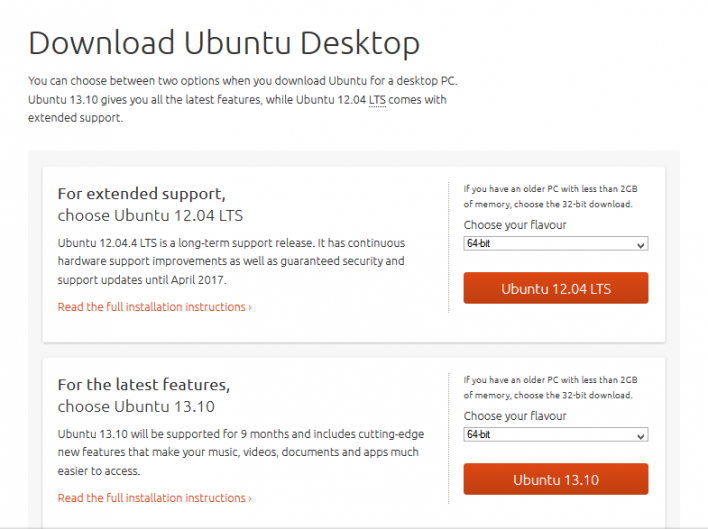
You need to download the 64-bit version of Ubuntu if you have a Windows 8 PC or one with UEFI firmware. Anything older, then you need to select the 32-bit version.
2. Burn The ISO File
If you have Windows 7, 8 or Mac OS X then you will be able to burn the ISO file to a disc without the need of a seperate program. Otherwise you have to download a program that will burn as ISO to a CD or DVD. (These are available either free or for a small fee, depending on which you choose.)
3. Boot From The Disc
The next step is to restart your computer and you may need to configure your PC to boot from the CD that you have just created. To do this, bring up your BIOS settings (usually done by pressing F2, F12 or DEL), find the boot settings section and change the boot order so that your CD/DVD drive is first on the list.
4. Test Ubuntu First
As soon as you have booted from the disc, you will given the option to try Ubuntu before you actually install it. You can explore the operating system and get a feel for how it looks and works. The trial just runs from the disc, without altering anything on your PC.
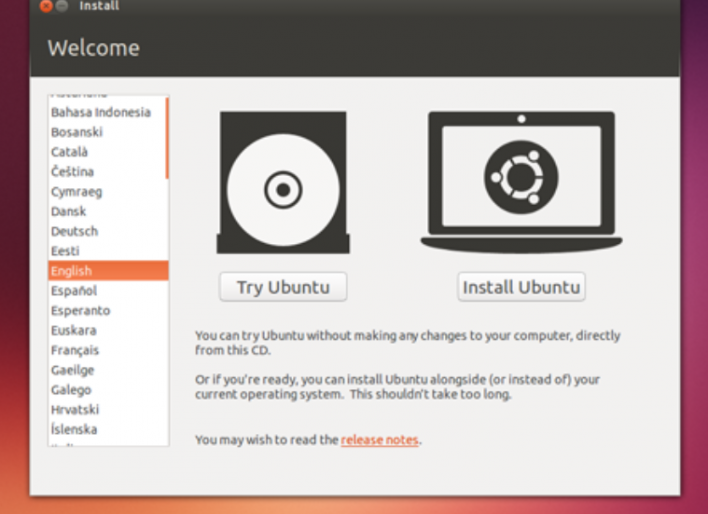
If you are happy with Ubuntu and you want to continue installing it, open the Install file which is located on the desktop.
5. Installing Ubuntu
At least 4.5GB of free space is required for installation, especially if you will be installing programs and creating files. Another handy tip is to make sure you are plugged into a power supply – you really don’t want your laptop battery dying on you half way through!
Check “Download updates automatically” and “Install this third-party software” – the latter will enable you to play MP3 files and watch Flash videos, including YouTube.
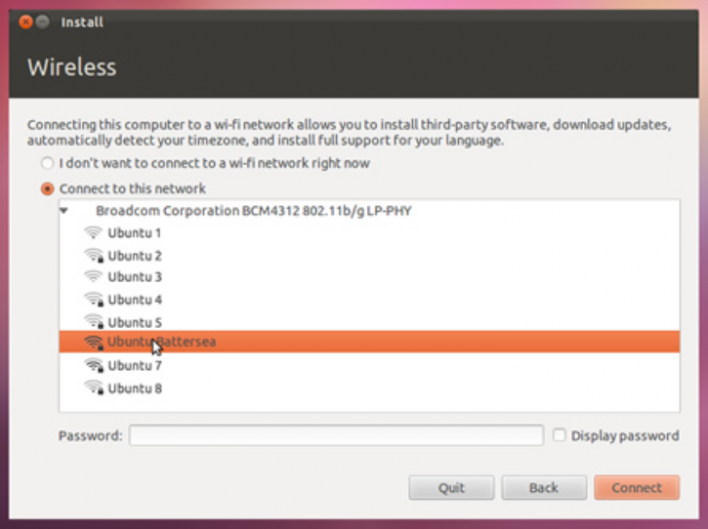
6. Set Up A Wireless Connection
You will be asked to select a wireless network if you are not already connected to the internet.
7. Sort Out Your Current Operating System
You have the choice of either installing Ubuntu to run alongside your previous Windows installation or replacing it completely. If you choose to install it alongside your Windows version, then you will be given the option to select an operating system every time you reboot your PC. Any old programs and files that you has will stay the same. However, if you decide to replace Windows completely, then any Windows programs, files or documents will be permenantly deleted.

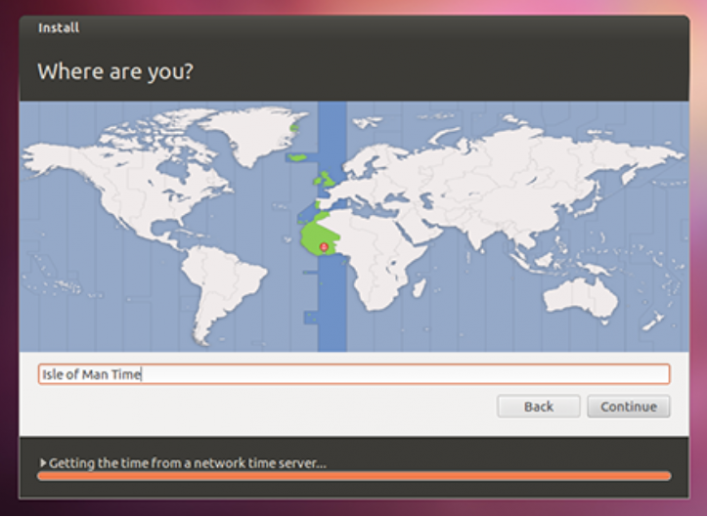
8. Set Your Location
Your location and timezone should be discovered automatically but just double check that it is correct before selecting the “Continue” button.
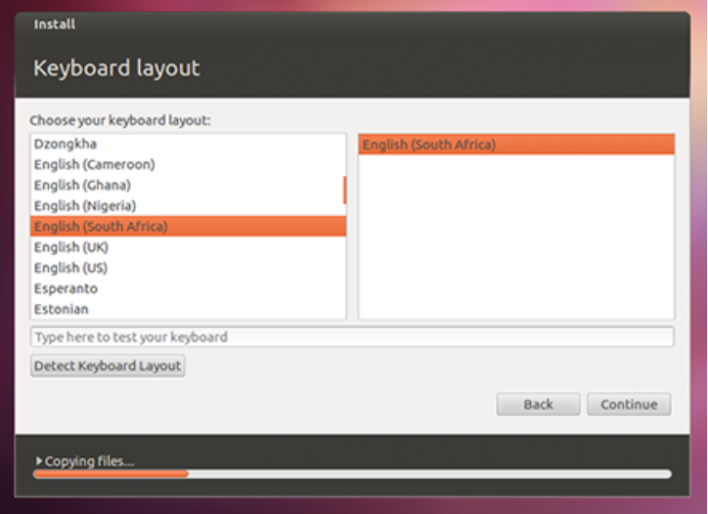
9. Select Keyboard Settings
You have a list of options when it comes to your keyboard layout. You can either pick your own or have Ubuntu select the correct one by clicking “Detect Keyboard Layout”.
10. Login
Type in your login information: your name, your computer’s name, pick a username and password.
11. Installation Almost Complete
The installation will now begin and you will be shown user tips for Ubuntu while you wait. When it’s finished you will be asked to restart the computer and then Ubuntu will load.
Now that you have installed Linux, get using it. You may find it quite a lot different to Windows but don’t be scared. Stick with it and you might just become one of the millions of Linux lovers who swear never to return to Windows.
Have any tips? Share them with us!
[Cover Image via Wallsave]