
How To Blur Images In Photoshop
How ToPhoto and ImagePhoto and Image Editing September 30, 2014 Scott Lee
If you’ve used Instagram, you’ve probably had a play around with the option that allows you to blur part of an image, to give focus to a circular or horizontal section of your photo. This can be very effective on photos, creating what at first glance looks like a shot taken with a proper focal lens when really it was taken by your smartphone. It’s very limited though and just gives a taste of what you can do with blurring images, while Photoshop’s options for blurring are a whole different blurred ball game.

Open any image in Photoshop to use as a test, a photo that includes a main subject, any person or object, will work best. Now select Filter from the top menu and hover over Blur, you’ll see a dazzling array of blur options, eleven in CS3, these will simulate every kind of blur known to man, from the blur of a fast moving car driving past to lens blur to the blur of a spinning wheel, they are all here.
If you have a composite image made up of layers in Photoshop, blurring individual layers, even just slightly, can give a real feeling of reality and depth, but we are gong to concentrate on a single layer image for now.
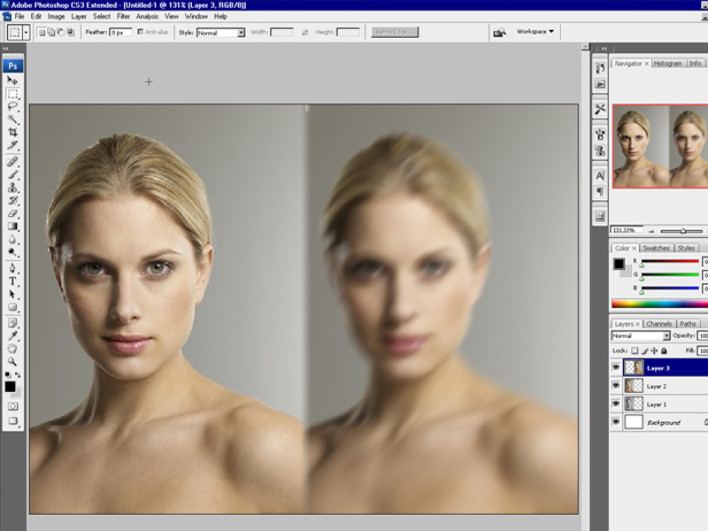
The sort of blur you are used to seeing on Instagram is a simple focal blur, but first you have to select which area of the image you need to blur, or it will blur the whole thing, so select wither manually, with the lasso or using the magic wand tool, the subject in the middle of the photo, now inverse that selection (Select, Inverse) and choose the Blur filter (Filter, Blur, Blur). If it doesn’t look quite blurred enough try blurring it a little more (Filter, Blur, Blur More).
You can repeat these steps as many times as you like for more blurring. Your photo should now have highlighted the main subject, placing blurring all around it, better than Instagram already.
To experiment with more options, undo your changes and now try the Filter, Blur, Lens Blur and Photoshop will bring up a separate window with a number of attributes you can alter to simulate a camera lens. You will be given a real time preview of all the rendering, so play around with them and see what you can do with your photo.
For finer detail you can also use the manual blur brush, thirteenth down on the left hand sidebar area the Blur/Sharpen and Smudge tools, which work like the brush tool, but blur and blend instead of painting, much like wiping a damp cloth over a watercolour, try adding these effects to the blur filters for really subtle effects on your photos.
[Image via: Russ Payne]